In brief
For small parts, start with the usable contact region, the force the part can tolerate and the evidence that the correct component has been acquired. Select the gripper together with presentation and placement tooling, then validate detection and release on representative components.
Describe the component and its presentation
A small component can be easy to carry yet difficult to access, orient or recognise. Begin with a drawing of the part in its incoming presentation: tray pocket, fixture, feeder exit or loose collection. Mark permitted contact regions and the features that establish orientation. Record whether neighbouring parts or pocket walls obstruct the tool. The enquiry should identify dimensional variation and the condition in which parts actually arrive, including any film, residue or protective packaging relevant to contact.
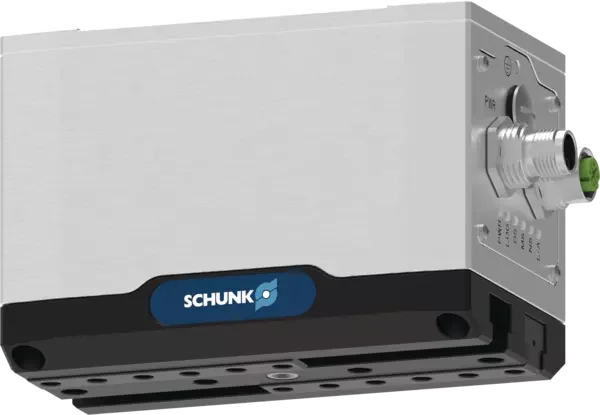
Schmalz's SUF page identifies flat suction cups for smooth or slightly rough workpieces, while SCHUNK describes the EGP as a parallel gripper for small components. These are different candidate contact strategies. Put both against the same presentation drawing. Ask whether a change to the tray or feeder would create a more reliable contact opportunity, and include that change in the proposal. A catalogue category labelled small components does not establish that a tool can reach your component.
References: Flat Suction Cups SUF · EGP gripper for small components
Choose a contact strategy before sizing the actuator
Sketch where a suction cup or mechanical finger would touch, how the part would be supported and how the tool would leave after placement. A delicate terminal, polished optical face or flexible wall may eliminate an otherwise convenient contact location. Ask the component owner to approve the proposed contact regions. For a mechanical tool, distinguish a grip that relies on surface friction from one using suitable part geometry; neither should be assumed suitable without a specific design assessment.
Robotiq's Hand-E specifications distinguish grip arrangements and place constraints on custom fingers. Use that as a prompt to request the proposed fingertip drawing and its applicable load assessment. For vacuum, ask the supplier to select the contact material and geometry against the actual surface. Keep the selection open until the whole approach and release path is reviewed. A tool that holds a sample when presented by hand may still be unsuitable when it must enter a tightly packed production tray.
References: Hand-E instruction manual: Specifications · Flat Suction Cups SUF
Specify the force window the component can tolerate
Ask how the supplier establishes enough holding capability without exceeding the component's acceptable contact load. Maximum gripping force alone cannot answer that question. SCHUNK's EGP family page describes adjustable-force options and different control capabilities by variant. Confirm the exact variant, available adjustment and behaviour during contact. A product family's most capable option should not be assumed present in every quoted unit. Have the component owner define damage criteria that the trial team can actually inspect.
Discuss approach and closing behaviour as well as the final holding condition. For a thin plastic housing, for example, a setting that retains the part might still leave unacceptable deformation. This is a hypothetical design concern, not a measured claim about a named gripper. Request a controlled trial spanning accepted component variation and inspect the output after release. Keep any successful settings tied to the tested tool geometry and programme so they do not become unexplained defaults for unrelated parts.
References: EGP gripper for small components · Hand-E instruction manual: Specifications
Check usable opening and the complete finger envelope
Compare the required opening at the contact surfaces with the actual finger design, rather than relying only on an actuator's stroke label. Ask how the proposed fingers clear the incoming pocket at their widest configuration and reach the smallest accepted part. Review the full movement envelope in the fixture drawing. Long extensions can solve reach while creating other load and clearance questions. Robotiq's custom-fingertip guidance requires designers to respect the model's geometry and mechanical constraints.
Request a drawing review before treating a prototype as production tooling. A printed mock-up may help assess geometric access, but it is not evidence that the final fingers have adequate stiffness, strength or service life. Ask the supplier which design assumptions depend on material and manufacturing method. Include fastener access and repeatable replacement in the review. An intricate fingertip that is difficult to install consistently may create more variation than the actuator specification suggests, especially when maintenance staff must replace it between experiments.
References: Custom Fingertips for Robotiq Grippers
Specify what part detection must distinguish
Robotiq describes object detection based on whether commanded finger motion is obstructed, rather than tactile sensing. That distinction matters when the component is small relative to the fixture. Ask the integrator how the system will distinguish the intended part from a blocked finger, an incorrectly presented part or contact with the tray. Do not treat the presence of a detection function as evidence that those cases are already covered.
Define the process decisions that need evidence: acquisition of a part, correct identity, acceptable orientation and successful placement. One signal may not answer all of them. Ask which decisions can be made from the proposed gripper feedback and which need another process check. Arrange abnormal-condition demonstrations through the qualified commissioning team, preserving the application's safeguards. Keep a record of the actual feedback and physical condition during each trial; that makes ambiguous detections easier to investigate without resorting to arbitrary changes in thresholds.
References: How Object Detection Works on Robotiq Grippers
Review contact material and the final release
For electronics or surface-sensitive components, specify the relevant material and contamination requirements with the product owner. Schmalz lists dissipative and low-marking SUF variants, including an NBR-ESD material option. That is evidence of available contact-material choices, not certification of the completed handling process. Ask for the exact material identity in the quotation and have the responsible specialist assess the whole required arrangement. Similar appearance is not a sufficient basis for substituting a replacement cup or finger pad.
Include release in the selection trial. Observe whether the component reaches the receiving location, remains attached to the tool or moves during withdrawal. Check that any supplier-proposed release method is compatible with the part and surrounding process. Small components can require careful presentation at both ends of the transfer, so identify who owns the receiving fixture and its acceptance criteria. Keep inspection requirements attached to the final component state rather than stopping the demonstration when the robot arrives above the destination.
References: Flat Suction Cups SUF · Custom Fingertips for Robotiq Grippers
Worked hypothetical example: a tray-fed connector
Hypothetical example: a small electrical connector arrives in individual pockets and must enter an inspection nest. Its top carries a fragile latch, its sides have reinforced shoulders, and its terminals must remain untouched. A vacuum candidate is asked to show a contact region clear of the latch. A mechanical candidate is asked to show fingers reaching the shoulders without contacting the terminals or tray. Neither proposal is accepted merely because the component weighs little.
The trial plan includes the smallest and largest accepted housings, imperfect but permitted tray placement, an empty pocket and a deliberately incorrect presentation arranged by qualified personnel. Record pickup, detection, component condition and final orientation separately. If the mechanical proposal cannot distinguish tray contact from acquisition, ask for an improved contact or sensing plan. If the vacuum proposal lacks a repeatable clear surface, revisit presentation. The decision follows evidence about the connector and its fixtures; it is not a general judgement that either gripping principle handles all small parts better.
References: How Object Detection Works on Robotiq Grippers · Flat Suction Cups SUF
Accept a repeatable configuration and replacement process
Require the acceptance record to name the actuator variant, contact tooling, component revisions, fixtures, relevant settings and observed limitations. Include the successful placement criterion and the response to an uncertain acquisition. Keep a promising prototype result distinct from a commissioned installation. SCHUNK's variant-specific EGP features and Robotiq's custom-finger constraints show why the exact configuration belongs in the record: a family name does not fully describe the tool's control or contact behaviour.
Ask how wear items are inspected and replaced, how the replacement geometry is checked and which changes require another trial. Keep a representative accepted sample for comparison where practical. Review tooling when the component supplier changes its moulding, coating or packaging, even if the commercial part name stays the same. A concise configuration record gives the next engineer a useful starting point and makes the private experiment reproducible without inventing performance statistics or claiming experience that this documentary guide does not have.
References: EGP gripper for small components · Custom Fingertips for Robotiq Grippers
Checklist
- Map permitted contact and the incoming presentation.
- Review contact geometry before selecting actuator size.
- Specify controllable force and inspectable damage criteria.
- Check the complete finger or cup envelope through approach and release.
- Distinguish acquisition, identification, orientation and placement evidence.
- Confirm exact contact materials and specialist process requirements.
- Run representative and controlled abnormal-condition trials.
- Retain the accepted configuration and replacement-check procedure.
Common questions
Why can a powerful gripper be a poor choice for a tiny component?
The component may need a controllable contact force, suitable access and unambiguous detection more than a high maximum force. Check the exact variant's control options and the proposed contact design against the component's damage limits.
References: EGP gripper for small components · Hand-E instruction manual: Specifications
Does an ESD-labelled suction cup establish an ESD-safe process?
No. The cited SUF page identifies material options for electrostatic-discharge-sensitive handling. The responsible specialist still needs to assess the complete arrangement against the component and process requirements.
References: Flat Suction Cups SUF
Sources & review
Based on manufacturer documentation, not hands-on component trials, ESD validation or measured performance. The connector scenario is hypothetical.
Audience: Assembly and laboratory automation teams. Updated .
- Flat Suction Cups SUF
- EGP gripper for small components
- Hand-E instruction manual: Specifications
- Custom Fingertips for Robotiq Grippers
- How Object Detection Works on Robotiq Grippers